I'm so excited that today is finally here and I'm actually writing my first Tuesdays with Dorie post! As I said before, a wide-range group of bakers from all over the globe will be baking the same recipe from the book, Baking with Julia by Dorie Greenspan and then blogging about what they baked. The rules require that bloggers not include the recipe in their blogs but you can find the recipes in the book as well as on the host's blog.
The recipe that was chosen for this week is White Loaves on pp. 81-82. The host blog for this recipe is Jules at Someone's in the Kitchen. On the Tuesdays with Dorie page you can access the links to all of the posts from the participating bloggers.
Now enough of the rules...on to the beautiful bread. I will tell my story with pictures.

This is a perfect place to begin as so many people are afraid of yeast and afraid to make bread. In reality it is quite easy.
The recipe only required 6 basic ingredients (water, yeast, sugar, bread flour, salt and unsalted butter) and a mixer. Most of the steps were your typical bread making steps. I did a few things differently (shown in red).

Bloom the yeast.

Combine ingredients as directed in the mixer. I did not add all of the flour! Instead of 7 cups I used about 6 1/2 cups. The dough just seemed way too stiff and dry for all of the flour.

The mixer really had to work hard. I had to let it, and the dough, rest a few times, but then most bread I've made requires that anyway. It seemed a little odd to add the butter at the end instead of at the beginning, but it all worked out just fine.

Prepare your bowl by oiling it generously.

When you have finished mixing / kneading your dough in the mixer, pour out onto a floured work surface and knead a little bit more by hand. This is where you can really work out all of the stress in your life. Think...push out the bad, fold in the good. The dough doesn't really need much kneading at this point, but it can certainly shoulder your stress with a little more kneading if YOU need it. :)


When you've shaped your beautiful dough into a ball, put it in the bowl and then turn it over to be sure all surfaces are coated well with the oil you added to the bowl earlier.

Cover the bowl with a clean cloth and set aside in a quiet, warm, undrafty place and let it take a little nap.

After about an hour...wahlah!!! It has changed into a mound of wonderful, yeasty bread dough. But you aren't quite ready to get out the butter yet.

Punch it down.

Dump it out on a floured surface.

Divide into halves.

Form into loaves. Dorie does a great job of describing how to do this by first forming a rectangle, then folding the dough 2/3's down and then the last third up to meet the edge. Pinch it together. Tuck the ends together and...

Put into two buttered loaf pans seam side down. Cover with some buttered plastic wrap and let them take another little nap in a warm place for about 45 minutes.

The dough again transforms into nice airy loaves ready to bake. Dorie advised something regarding baking the loaves that I loved. About 10 minutes before you think they are done, turn them out of the pans and return to the oven directly on the rack without the pans. This step definitely helped the loaves to brown nicely all the way around. Be sure to temp the loaves when deciding whether they are done and ready to be removed from the oven. The interior of the loaf should be about 200 degrees.

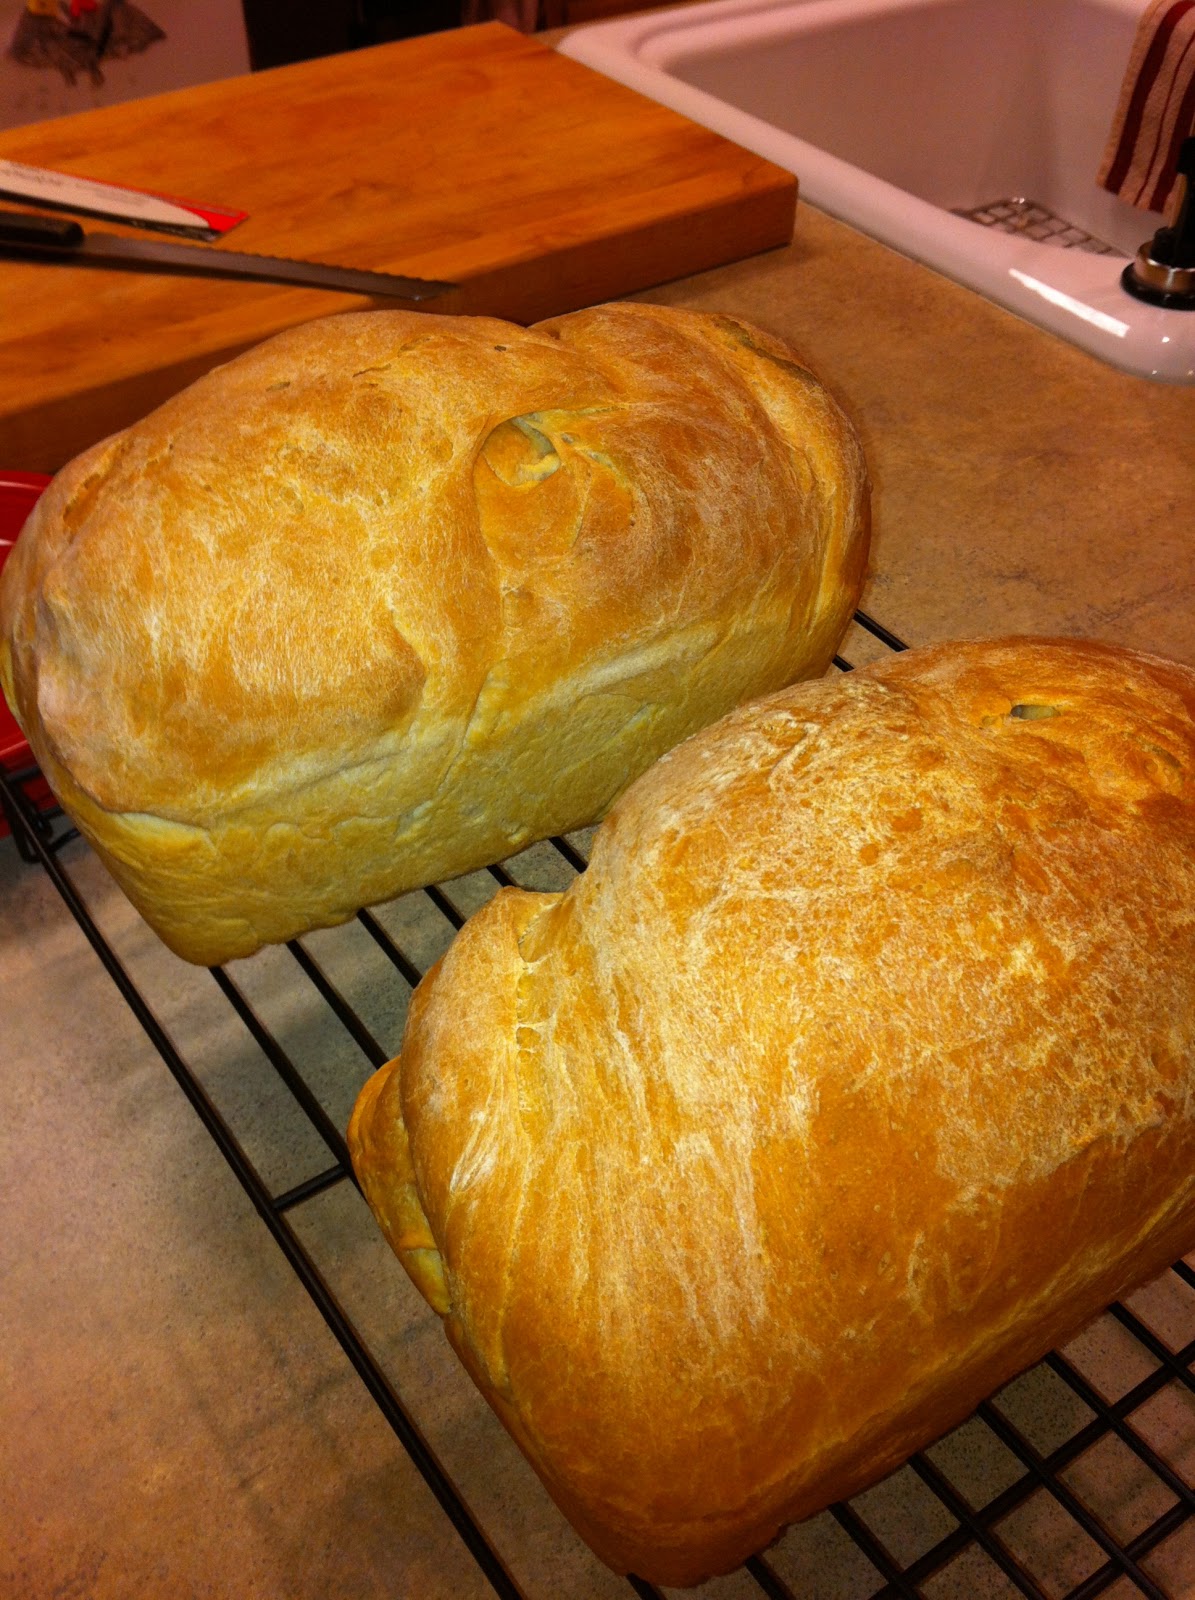
Let the loaves cool on a rack (My tasters couldn't wait until they were truly cool). The finished loaves turned out beautiful, cut nicely, had a crunchy crust, nice crumb and a soft center. I thought they could use a little more salt, but other than that they were delicious.

IF you have any left, it makes terrific toast. A little added honey or peanut butter and jelly makes it even better. This is a great basic white bread recipe. I hope my changes (shown in red) will be helpful to you.
Wow!! I finally made it through this and I guess you did, too. I promise these posts and the pictures that go with them will get better as we go along this journey. Thanks for sticking with me. I welcome your feedback.
You posted all the steps!! It's great! and I can see why the tasters couldn't wait!
ReplyDeleteA lot of us had...issues...with our Kitchen Aid stand mixers. After making my bread I happened to be skimming the KA recipe manual booklet (seriously, I have no idea why) and it says that when making yeast dough you should never go above speed setting 2. Looking back, I turned my mixer back down to speed 2 many times to make it stop convulsing and to try to get rid of the awful smell it was producing. Now we all know for next time! And you loaves are beautiful! I love the texture of the crust and how brown they got!
ReplyDeletepretty loaves ... I like how their not perfectly smooth on top ... they look rustic. :)
ReplyDeleteLooks delicous - great process photos too!
ReplyDeleteI like the thought of pushing out the bad and rolling in the good - wise words :-)
ReplyDeletePleased to meet you & looking foward to more TWD.
Gorgeous loaves! Mmmm, toast with butter and honey. Mmm.
ReplyDeleteWhat a great step-by-step tutorial you gave. I enjoyed it very much Nana! My mixer took quite a beating on this dough too, but it was worth it. Your bread looks so pretty. Nice to meet you through BWJ!
ReplyDeletelove all the step by step pics :)
ReplyDelete