Showing posts with label TWD. Show all posts

Tuesday, March 20, 2012

TWD - Irish Soda Bread


Happy belated St. Patty's Day!  Hope you were able to celebrate with some of the traditional Irish foods.  Our Tuesdays with Dorie / Baking with Julia selection fit right in with the theme.  Carla and Cathleen chose Irish Soda Bread from page 214 of the Baking with Julia book.

I chose to make the bread as presented and had planned to make it again with raisins as another traditional variation, but alas, Lassie, I ran out of time.  You could let your imagination run wild with ways to vary it.  The basic recipe is pretty simple with only four ingredients.


Wait!!!  I only see three!  Maybe you can guess the third.  If not, see if you can spot it a little later on.

Now, don't be scared when it looks like a raggedy mess.


It actually comes together quite nicely with very little effort and no need for a mixer.


Don't forget to slice an "x" in the top before you bake it!


The bread is very dense and went well with the soup we had for dinner.


I had an abundance of apricot lekvar left from the rugelach from a previous post and it added a nice touch to the meal as well.  No dessert needed!!!


The information in the book said that you needed to eat it the same day, but I wrapped it in plastic wrap and it still had some nice moisture to it the next morning so I sliced it and made some cinnamon toast for breakfast.


This recipe was a nice change from the more difficult rugelach that we made earlier. I hope you've discovered the fourth ingredient by now but no need to worry you can always check with out hosts listed above or pick up a copy of the book.

Have fun cooking and I'll try to get another post in before the next Tuesday's with Dorie event.

Tuesday, March 6, 2012

TWD - Rugelach

This week's selection for Tuesdays with Dorie / Baking with Julia is Rugelach, hosted by Jessica of My Baking Heart and Margaret of The Urban Hiker.  Rugelach is a rustic, rich cookie with a butter and cream cheese dough that is filled, rolled, sliced and baked.  


The recipe is on pages 325-326 of the Baking with Julia book or posted on the blogs of the hostesses calls for a filling of apricot or prune lekvar, assorted nuts and dried fruits, and a cinnamon/sugar mixture.  There is a reference to a recipe for the lekvar (which I made) or you can find it at specialty grocery stores or online.


So that's the background, now here is how it went down:  

  • My plan was to make it over the weekend at our lake house.  I got the pastry dough and lekvar made then ran out of time and had to pack it all up in the cooler and bring it back to our other house.  
  • When I made the dough, I broke the cardinal rule of cooking and baking by not measuring all of the flour into a separate prep bowl.  Instead I was putting the three cups of flour directly into the food processor by half cup quantities.  Somewhere in the middle of mixing I was interrupted and lost track of where I was.  I believe I shorted it by a half cup of flour.
  • The apricot lekvar was easy and came together nicely.  I may make it again sometime with some added spices and/or herbs and use it as a spread on toast.  The only problem was that I needed two cups and the recipe said that it made 3/4 cup.  This led me to make 2 1/2 times the recipe so that I would have the right amount plus a little bit left.  As it turns out that one recipe makes quite a bit more than 3/4 cup.  I'm really glad I like it as a spread!!
  • My last mistake was not using a double pan with my second batch.  They burned a little bit on the bottom.  Batches 1, 3 and 4 were double panned and the result was a nice crunchy bottom
All that said, they look kind of sad but still tasted pretty darn good...even better with a glass of milk.


Now that I know the pitfalls, I will probably try to make them again soon and play around with some different fillings.  Nutella or chocolate would be close to the top of my list.

Tuesday, February 21, 2012

TWD - Chocolate Truffle Tartlets

It's Tuesday again with another delicious recipe from Dorie Greenspan as I continue to blog with Tuesdays with Dorie.  The recipe is found on pages 382-383 of her book, Baking with Julia or you can go to the blog of one of our hosts ( Steph, Spike, Jaime and Jessica) to find it.  


A beautiful, rich, seemingly sinful chocolate tart is the perfect dessert for the recent Valentine's Day or just when you want a little guilty pleasure.  This recipe is relatively easy to make and can be done in steps.  Here is how mine went together.

Step 1 is making the tart crusts.

Assemble the ingredients (Mise en place).

Combine in the food processor.  I would recommend
adding an extra tablespoon of ice water as the dough was pretty dry.
Roll out (you'll need to smear the dough together
with the palm of your hand), shape into a rough square and flatten.
Wrap in plastic wrap and chill for at least 20 minutes.


 While you're waiting, how about dinner?

Roasted chicken and lots of different vegetables.  The chicken pan has onion,
parsnips, carrots, celery and kale.
Now, back to the project at hand.

Spray your tart pans so your pretty little tarts will come out.

Divide the dough into six equal pieces (I used my scale, but you could just eye-ball it).
Roll out your dough into a rough circle large enough to fit your tart pan all the way up the sides.
Gently press the dough into the pan being sure to get
it into the angle. 

Press along the sides to fill the grooves with dough.
Shave off the excess dough. Prick the bottom of the crust
all over with a fork.


Ready for the oven.

Bake until the crust is dry blistery, and firm.  Turn them halfway
through the baking time.  I actually baked mine a little longer than the
directions indicated as I wanted to be sure they were crispy
{but not burned :) }.
Time to make the filling.

Assemble your ingredients.


I used Biscoff for the biscotti because I love it and I didn't have
time to make my own.  Don't chop them too finely.
Be sure to beat the eggs long enough to get to ribbon stage.

Fold the eggs with the chocolate mixture.  Lighten the chocolate
with about a third of the egg mixture first.  Don't be heavy-handed
at this point or you will lose all of the beautiful air you created
in the egg yolks.

Scoop evenly into the tart pans.  Smooth the tops and bake.
Again, I baked a little longer than instructed (it could just be
my oven).


Cool for 20 minutes and they are ready to eat.

I wasn't serving these tarts for an occasion and wasn't prepared to
plate them properly with a sauce and a garnish so I decided
I could at least have a little fun with it. 

I was very pleased with the outcome of this recipe. The dough is a little hard to work with but seems to be very forgiving so you can compensate by piecing and patching.  The filling could be varied by adding different goodies.  Walnuts or brickle would make a nice addition.  Homemade biscotti would also be a nice touch.

Now, I'm off to share these rich and delicious desserts with some friends.


Monday, February 6, 2012

TWD - Basic White Bread


I'm so excited that today is finally here and I'm actually writing my first Tuesdays with Dorie post!  As I said before, a wide-range group of bakers from all over the globe will be baking the same recipe from the book, Baking with Julia by Dorie Greenspan and then blogging about what they baked.  The rules require that bloggers not include the recipe in their blogs but you can find the recipes in the book as well as on the host's blog.

The recipe that was chosen for this week is White Loaves on pp. 81-82.  The host blog for this recipe is Jules at Someone's in the Kitchen.  On the Tuesdays with Dorie page you can access the links to all of the posts from the participating bloggers.

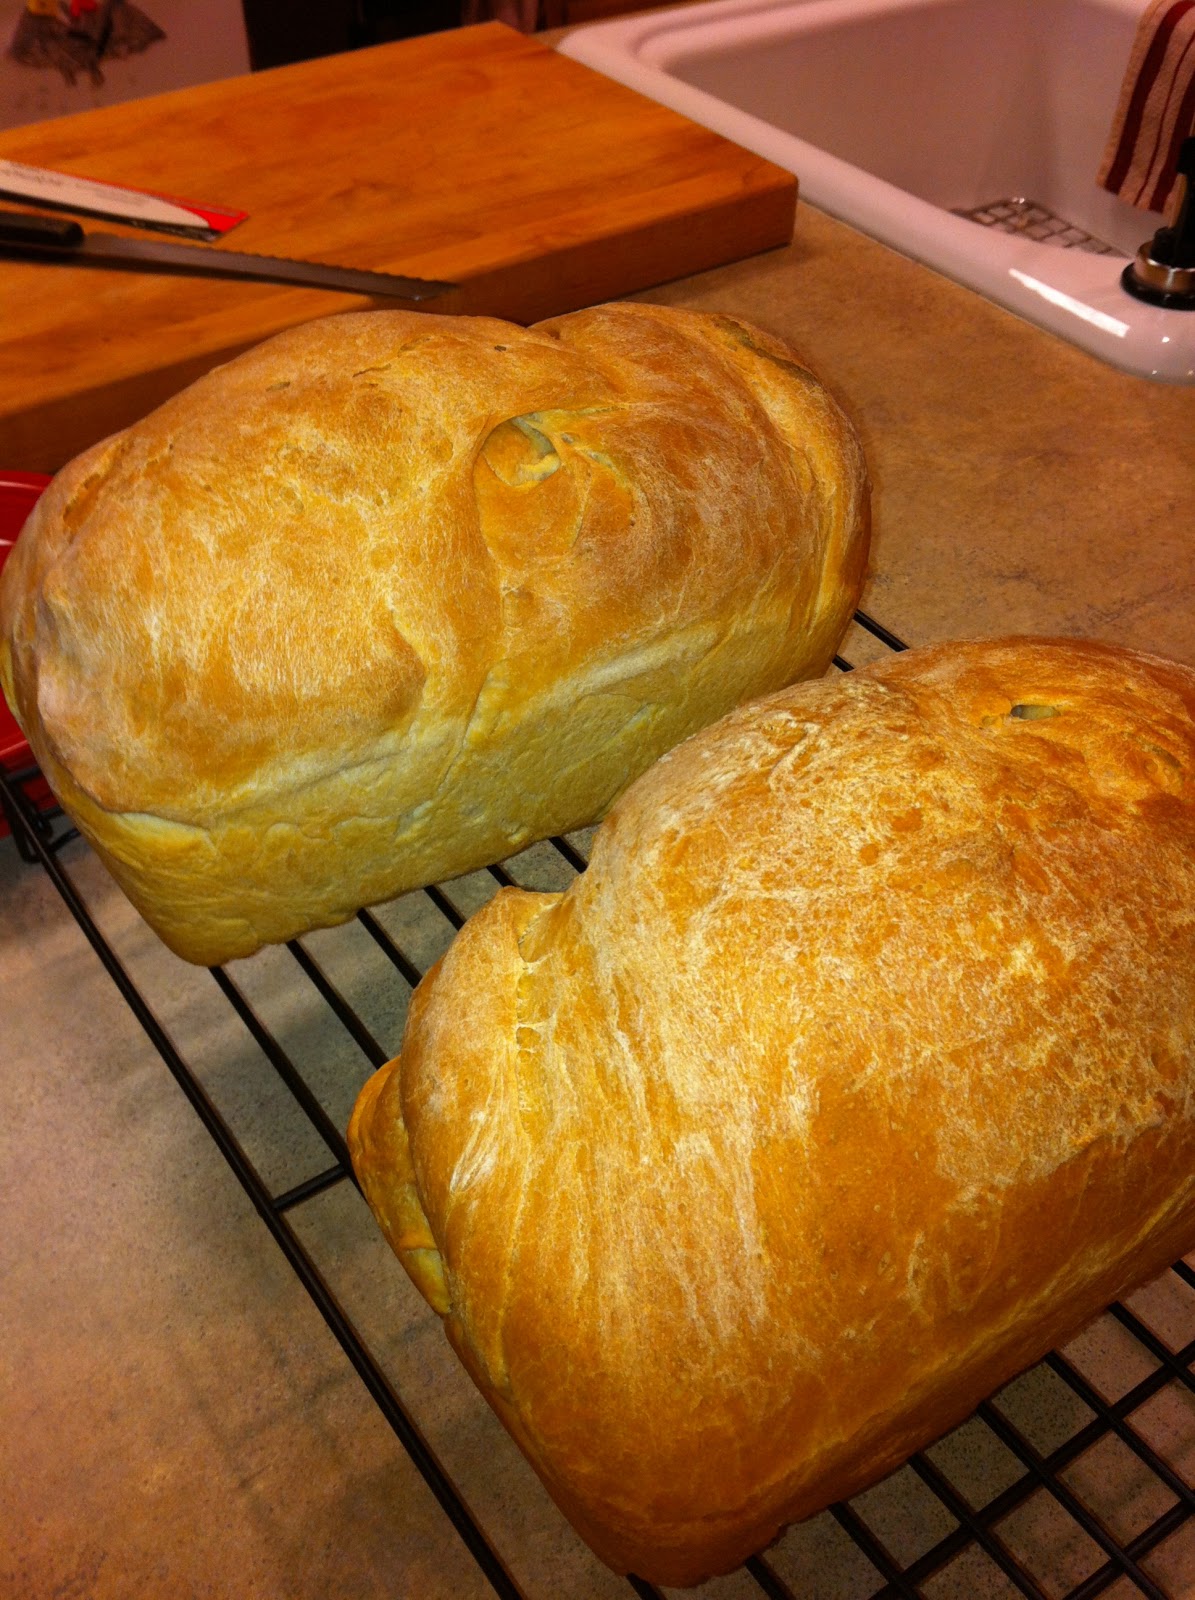
Now enough of the rules...on to the beautiful bread.  I will tell my story with pictures.


This is a perfect place to begin as so many people are afraid of yeast and afraid to make bread.  In reality it is quite easy.


The recipe only required 6 basic ingredients (water, yeast, sugar, bread flour, salt and unsalted butter) and a mixer.  Most of the steps were your typical bread making steps.  I did a few things differently (shown in red).


Bloom the yeast.


Combine ingredients as directed in the mixer.   I did not add all of the flour!  Instead of 7 cups I used about 6 1/2 cups.  The dough just seemed way too stiff  and dry for all of the flour.


The mixer really had to work hard.  I had to let it, and the dough, rest a few times, but then most bread I've made requires that anyway.  It seemed a little odd to add the butter at the end instead of at the beginning, but it all worked out just fine.


Prepare your bowl by oiling it generously.


When you have finished mixing / kneading your dough in the mixer, pour out onto a floured work surface and knead a little bit more by hand.  This is where you can really work out all of the stress in your life.  Think...push out the bad, fold in the good.  The dough doesn't really need much kneading at this point, but it can certainly shoulder your stress with a little more kneading if YOU need it. :)


When you've shaped your beautiful dough into a ball, put it in the bowl and then turn it over to be sure all surfaces are coated well with the oil you added to the bowl earlier.


Cover the bowl with a clean cloth and set aside in a quiet, warm, undrafty place and let it take a little nap.


After about an hour...wahlah!!!  It has changed into a mound of wonderful, yeasty bread dough.  But you aren't quite ready to get out the butter yet.


Punch it down.


Dump it out on a floured surface.


Divide into halves.


Form into loaves. Dorie does a great job of describing how to do this by first forming a rectangle, then folding the dough 2/3's down and then the last third up to meet the edge.  Pinch it together.  Tuck the ends together and...


Put into two buttered loaf pans seam side down.  Cover with some buttered plastic wrap and let them take another little nap in a warm place for about 45 minutes.


The dough again transforms into nice airy loaves ready to bake.  Dorie advised something regarding baking the loaves that I loved.  About 10 minutes before  you think they are done, turn them out of the pans and return to the oven directly on the rack without the pans.  This step definitely helped the loaves to brown nicely all the way around.  Be sure to temp the loaves when deciding whether they are done and ready to be removed from the oven.  The interior of the loaf should be about 200 degrees.


Let the loaves cool on a rack (My tasters couldn't wait until they were truly cool).  The finished loaves turned out beautiful, cut nicely, had a crunchy crust, nice crumb and a soft center. I thought they could use a little more salt, but other than that they were delicious.


IF you have any left, it makes terrific toast.  A little added honey or peanut butter and jelly makes it even better.  This is a great basic white bread recipe.  I hope my changes (shown in red) will be helpful to you.


Wow!!  I finally made it through this and I guess you did, too.  I promise these posts and the pictures that go with them will get better as we go along this journey.  Thanks for sticking with me.  I welcome your feedback.